 Pin It
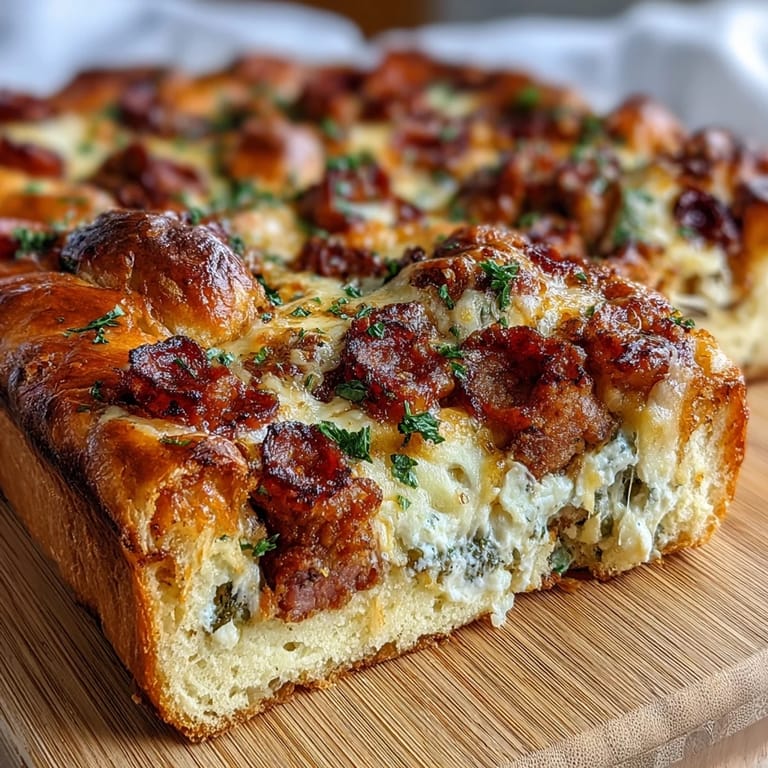
 My nonna used to make this pie every Easter, and honestly, I didn't appreciate it until I was older and realized how much work went into those golden lattice strips. There's something about the combination of creamy ricotta, salty salami, and buttery pastry that feels like a celebration in every bite. The first time I attempted it myself, my kitchen smelled absolutely incredible, and I knew I'd found a recipe worth mastering. It's the kind of dish that makes people pause mid-conversation when they taste it, wondering what makes it so special. That's when you know you've made something memorable.
I made this for a small Easter gathering a few years ago, and what I remember most isn't the cooking but watching my friend Marco's face light up when he took his first bite. He closed his eyes like he'd transported back to his childhood in Naples, and that moment reminded me why we cook these recipes in the first place. It wasn't about impressing anyone, it was about creating something that connects us to the people we love and the places we come from. That pie became the centerpiece of our entire celebration, and everyone asked for the recipe.
Ingredients
- All-purpose flour: The foundation of your pastry, and cold flour makes all the difference in achieving that tender, flaky crust that everyone will want seconds of.
- Unsalted butter: Keep it cold and cubed straight from the fridge, and work it in quickly so the pastry stays light and doesn't turn tough and greasy.
- Whole-milk ricotta cheese: This is where the magic happens, so drain it well ahead of time to avoid a watery filling that will make your pastry soggy.
- Parmigiano-Reggiano cheese: Use freshly grated if you can, as the pre-grated stuff contains anti-caking agents that change the texture and flavor of your filling.
- Italian salami: Dice it into small cubes rather than mincing it, so you get those little pockets of salty, spiced flavor throughout every slice.
- Mozzarella cheese: Shredded mozzarella adds a stretchy quality that makes the pie feel more indulgent and helps bind everything together.
- Heavy cream: This keeps the filling silky and prevents it from becoming dense or rubbery as it bakes.
- Fresh parsley: Chopped fresh herbs brighten up the richness and add a subtle freshness that balances all those creamy, salty flavors.
- Nutmeg: Just a pinch, because this spice has an uncanny ability to make savory dishes taste more complex and sophisticated.
Tired of Takeout? 🥡
Get 10 meals you can make faster than delivery arrives. Seriously.
One email. No spam. Unsubscribe anytime.
Instructions
- Preheat and prepare your pan:
- Get your oven warming to 375°F and grease your springform pan generously so the pastry releases cleanly when you're ready to serve. A cold oven means uneven baking, so don't skip this step.
- Make the pastry dough:
- Combine flour and salt, then work in those cold butter cubes with your fingertips until the mixture looks like coarse breadcrumbs. Add the eggs and just enough cold water to bring everything together into a soft, slightly sticky dough, then wrap it up and let it rest in the fridge for 20 minutes while you get everything else ready.
- Line the pan:
- Roll out two-thirds of your chilled dough and fit it into the pan, leaving some overhang around the edges. Don't worry about it being perfect, because those rustic imperfections actually add to the charm.
- Build the filling:
- In a large bowl, whisk together ricotta, eggs, and heavy cream until you have a smooth base, then fold in both cheeses, the parsley, salt, pepper, and nutmeg. Gently stir in the salami cubes so they're evenly distributed, tasting as you go and adjusting seasonings if needed.
- Fill and top:
- Pour the filling into your pastry-lined pan and smooth the top gently, then roll out your remaining pastry and cut it into even strips about half an inch wide. Arrange these strips in a classic lattice pattern, tucking the ends under and crimping the outer edge with a fork for a finished look.
- Brush and bake:
- Give the entire pie a light brush of beaten egg, which will give it that beautiful golden sheen, then slide it into your preheated oven for 55 to 60 minutes. The pie is done when the pastry is deep golden and the filling has set but still jiggles just slightly when you gently shake the pan.
- Cool and serve:
- Let the pie rest for at least 30 minutes before you even think about slicing, because this allows the filling to set up properly and makes serving much cleaner. Serve it warm or at room temperature, and watch how quickly it disappears.
 Pin It
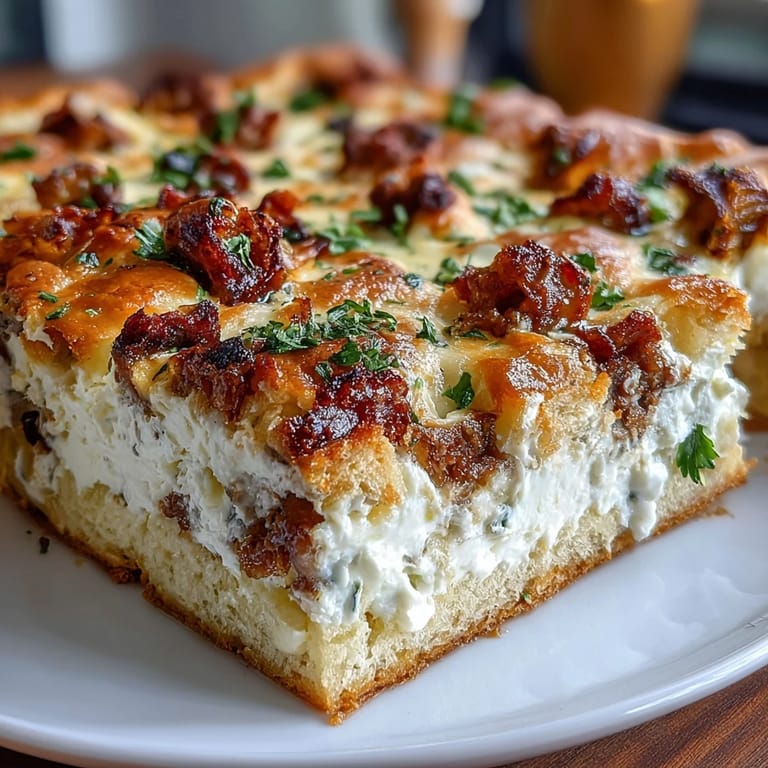
 There was a moment last year when my sister brought her young daughter over to help me make this pie, and watching that little girl carefully place the pastry strips in a lattice pattern changed something for me. She was so focused, tongue poking out slightly as she concentrated, and suddenly I realized this recipe was becoming part of her story too, the way it had become part of mine and my nonna's before that. Food does that, it carries memory and love forward through generations in a way that's almost magical.
The Story Behind This Pie
In Italy, this pie is called Torta Pasqualina in some regions and known by different names across the country, but the concept is always the same: a celebration of spring, renewal, and the abundance of eggs that symbolize Easter. What I love about this particular version is how it bridges the gap between a vegetable-forward Italian pie and something heartier that works as a main course. The addition of salami is what gives it character, transforming what could be a delicate custard pie into something with real substance and personality. Every family seems to have their own variation, which means there's room to make this your own.
Making It Your Own
The beauty of this recipe is that it's forgiving enough to adapt based on what you have on hand or what you're in the mood for. You can swap the salami for prosciutto if you want something milder, or omit the meat entirely and add sautéed spinach, artichokes, or roasted peppers for a vegetarian version that's just as delicious. I once made it with some leftover roasted asparagus and fresh herbs from my garden, and it was one of the best versions I've ever made. The filling is your canvas, so trust your instincts and don't be afraid to experiment.
Storage and Serving Suggestions
This pie is actually better the next day when all the flavors have had time to meld together, so making it ahead of time is not just allowed, it's encouraged. It keeps beautifully in the refrigerator for up to four days and reheats gently in a low oven without drying out, which makes it perfect for feeding a crowd without last-minute stress. You can even freeze it before baking, and when you're ready to serve, just add 15 to 20 minutes to the baking time and cover the crust if it browns too quickly.
- Slice this pie at room temperature for the cleanest presentation and fullest flavor.
- A simple green salad with lemon dressing is all you need alongside it to make a complete meal.
- Leftover slices are surprisingly good cold straight from the fridge as an unexpected snack or packed lunch.
 Pin It
 Every time I make this pie, I'm reminded that some recipes are more than just instructions, they're invitations to slow down and cook with intention. I hope this becomes a tradition in your kitchen too, whether you serve it at Easter or whenever you want something that feels special and connected to something bigger than just dinner.
Recipe FAQ
- → Can I substitute salami with other meats?
Yes, prosciutto or cooked ham can be used as alternatives, each adding a slightly different flavor profile.
- → How do I ensure the pastry stays tender and flaky?
Use cold butter and avoid overworking the dough. Chilling it before rolling helps maintain tenderness.
- → Is it possible to make a vegetarian version?
Omit the salami and incorporate sautéed spinach or artichokes for added texture and flavor.
- → What is the best way to serve the pie?
Serve slightly warm or at room temperature to enjoy the full depth of flavors and maintain crust texture.
- → How long should the pie cool before slicing?
Allow it to cool at least 30 minutes to set properly, which helps achieve clean slices without crumbling.