Pin It
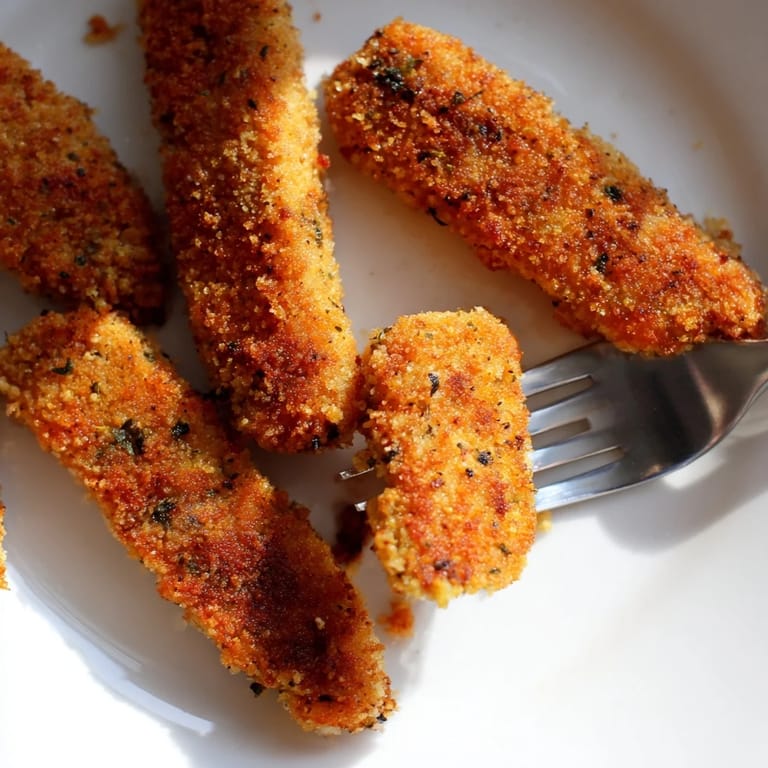
 My kitchen smelled like a fancy restaurant the first time I drizzled olive oil over panko breadcrumbs and watched them turn golden in the oven. I was skeptical that baked chicken could ever match the crunch of fried, but one bite proved me wrong. The panko stayed shatteringly crisp, the chicken stayed juicy, and I didn't have to deal with a splattered stovetop. Now these strips show up on weeknights when I want something that feels indulgent but doesn't wreck my energy or my cleanup routine. They've become my go-to when I need to impress without the stress.
I made these for a casual dinner with friends who usually order takeout, and they couldn't believe I baked them. One friend kept dipping strips into honey mustard and asking if I'd secretly fried them when no one was looking. Watching everyone reach for seconds felt like a small victory. It reminded me that good food doesn't have to be complicated or intimidating. Sometimes the best meals are the ones that make people feel at home and keep the conversation going long after the plates are empty.
Ingredients
- Boneless, skinless chicken breasts or tenders (500 g): Cutting them into uniform strips ensures even cooking, and patting them dry before breading helps the coating stick beautifully instead of sliding off.
- Salt (1/2 tsp) and ground black pepper (1/4 tsp): Simple seasoning on the chicken itself builds flavor from the inside out, not just on the surface.
- All-purpose flour (100 g): The flour creates a dry base that helps the egg mixture cling, forming the foundation for that crispy panko shell.
- Large eggs (2) and mayonnaise (2 tbsp): The mayo adds richness and helps the eggs coat the chicken more evenly, plus it keeps the meat tender as it bakes.
- Panko breadcrumbs (120 g): Panko's larger, airier crumbs crisp up in the oven far better than regular breadcrumbs, delivering that signature crunch.
- Dried Italian herbs (1 1/2 tsp): A blend of oregano, thyme, and basil brings warmth and depth without overpowering the chicken's natural flavor.
- Garlic powder (1/2 tsp) and smoked paprika (1/2 tsp): These two add a subtle savory backbone and a hint of smokiness that makes the strips taste more complex than they are.
- Cayenne pepper (1/4 tsp, optional): Just a pinch wakes up the flavor without making things spicy, but you can skip it if you prefer a milder bite.
- Olive oil (2 tbsp): Drizzling or spraying oil over the panko before baking is the secret to achieving that golden, crispy finish without frying.
Tired of Takeout? 🥡
Get 10 meals you can make faster than delivery arrives. Seriously.
One email. No spam. Unsubscribe anytime.
Instructions
- Preheat and Prep:
- Set your oven to 220°C (425°F) and line a baking sheet with parchment paper or place a wire rack on top for extra airflow. The high heat and good airflow are what transform the panko into a crispy shell.
- Prepare the Chicken:
- Pat the chicken dry with paper towels, then slice it into strips about 2 cm wide so they cook evenly. Season both sides with salt and pepper, letting the seasoning sink in while you set up the breading station.
- Set Up Breading Bowls:
- Arrange three shallow bowls in a row: one with flour, one with eggs whisked together with mayonnaise until smooth, and one with panko mixed with Italian herbs, garlic powder, paprika, and cayenne. This assembly line makes coating the chicken quick and tidy.
- Coat the Chicken:
- Dredge each strip in flour, shake off the excess, dip it into the egg mixture, then press it into the panko blend until fully coated. The pressing motion helps the crumbs stick and creates a thicker, crunchier layer.
- Arrange and Oil:
- Place the coated strips on your prepared baking sheet, leaving a little space between each one so the heat can circulate. Drizzle or spray olive oil lightly over the tops, which is what turns the panko golden and crisp.
- Bake:
- Bake for 18 to 22 minutes, flipping the strips halfway through so both sides get evenly golden. They're done when the coating is crisp and the internal temperature hits 74°C (165°F).
- Rest and Serve:
- Let the strips cool on the pan for 2 to 3 minutes before serving. This brief rest lets the coating firm up and reach peak crispiness.
 Pin It
 One evening I served these with a simple green salad and honey mustard on the side, and my neighbor's kid who claims to hate chicken asked for the recipe. That moment reminded me that food has this quiet power to change minds and bring people together without any fuss. These strips aren't fancy or complicated, but they've become a bridge to easy conversations and unexpected compliments. Sometimes the meals we remember most are the ones that just make everyone happy without trying too hard.
Serving Suggestions
These strips shine alongside classic dipping sauces like honey mustard, ranch, or spicy sriracha mayo, each one adding a different personality to the meal. I've also served them with a crisp coleslaw and roasted sweet potato wedges for a well-rounded dinner that feels satisfying without being heavy. They're sturdy enough to pack for picnics or casual gatherings, and they taste just as good at room temperature as they do fresh from the oven. A light Sauvignon Blanc or a crisp lager pairs beautifully if you're in the mood for a drink. The strips are versatile enough to work as a main dish, a snack, or even sliced over a salad for added protein.
Storage and Reheating
Leftovers keep well in an airtight container in the fridge for up to three days, and reheating them in a 200°C (400°F) oven for about 8 minutes brings back most of the crunch. I avoid the microwave because it makes the coating soft and chewy instead of crispy. If you want to freeze them, arrange the baked strips on a tray until solid, then transfer to a freezer bag for up to two months. Reheat frozen strips straight from the freezer in a hot oven, adding a few extra minutes to the time. They won't be quite as crispy as fresh, but they're still far better than anything store-bought.
Customization Ideas
You can swap the Italian herbs for any spice blend you love, like Cajun seasoning for heat or za'atar for a Middle Eastern twist. Adding grated Parmesan to the panko mixture creates a richer, cheesy crust that's hard to resist. For a gluten-free version, simply use gluten-free panko and flour, and the texture stays surprisingly close to the original. Greek yogurt works beautifully in place of mayonnaise if you want a lighter tang, and it helps the breading stick just as well.
- Try lemon zest in the panko for a bright, fresh finish that pairs well with seafood-inspired sides.
- Brush the strips with melted butter instead of olive oil for a richer, slightly more indulgent flavor.
- Serve them over pasta with marinara sauce for an easy chicken Parmesan twist without the extra frying step.
 Pin It
 These crispy panko chicken strips have earned their place in my weekly rotation because they deliver on flavor, texture, and ease without asking for much in return. Whether you're feeding a crowd or just want a dependable dinner that feels special, they won't let you down.
Recipe FAQ
- → How do I get the crispiest texture?
Use a wire rack on your baking sheet to allow air circulation underneath, and lightly spray or drizzle olive oil over the coated strips. Flip halfway through baking for even crispiness on all sides.
- → Can I prepare these ahead of time?
Yes, coat the chicken strips and refrigerate for up to 4 hours before baking. You can also freeze the coated strips for up to 2 weeks—add 5-7 minutes to the baking time when cooking from frozen.
- → What's the best way to check if the chicken is fully cooked?
Use a meat thermometer to ensure the internal temperature reaches 74°C (165°F). Alternatively, cut into the thickest strip—there should be no pink inside and juices should run clear.
- → Can I use Greek yogurt instead of mayonnaise?
Absolutely. Greek yogurt works as a lighter binding agent and creates the same coating results. The texture will be slightly different but equally delicious and more protein-rich.
- → How should I store leftovers?
Store cooled chicken strips in an airtight container in the refrigerator for up to 3 days. Reheat in a 180°C oven for 8-10 minutes to restore crispiness, or use in salads and sandwiches.
- → What dipping sauces pair best with these?
Honey mustard, ranch dressing, and sriracha mayo are classic choices. Consider BBQ sauce, buffalo sauce, or garlic aioli for variety. A tangy lemon squeeze also brightens the herbed flavor.