 Pin It
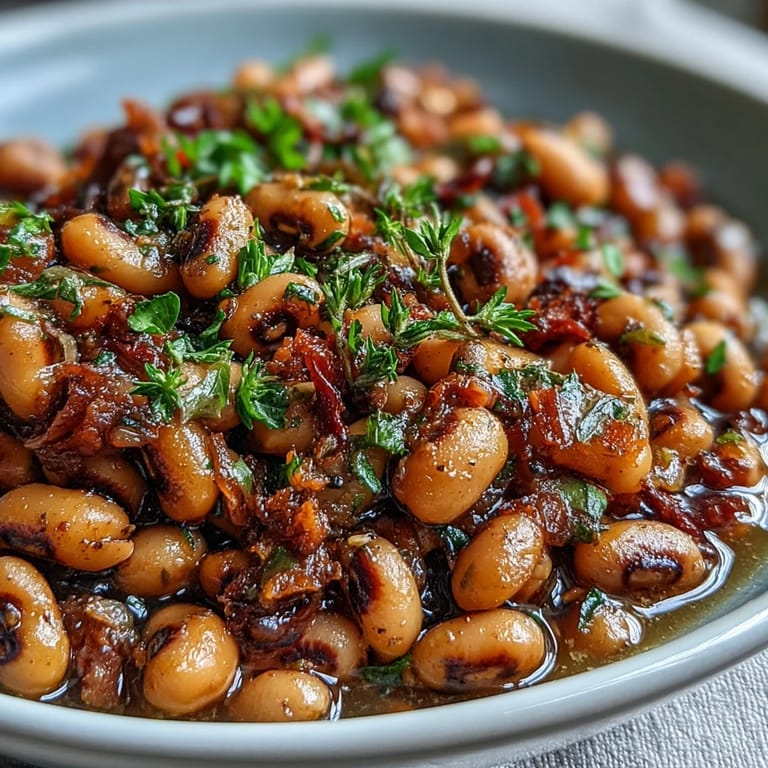
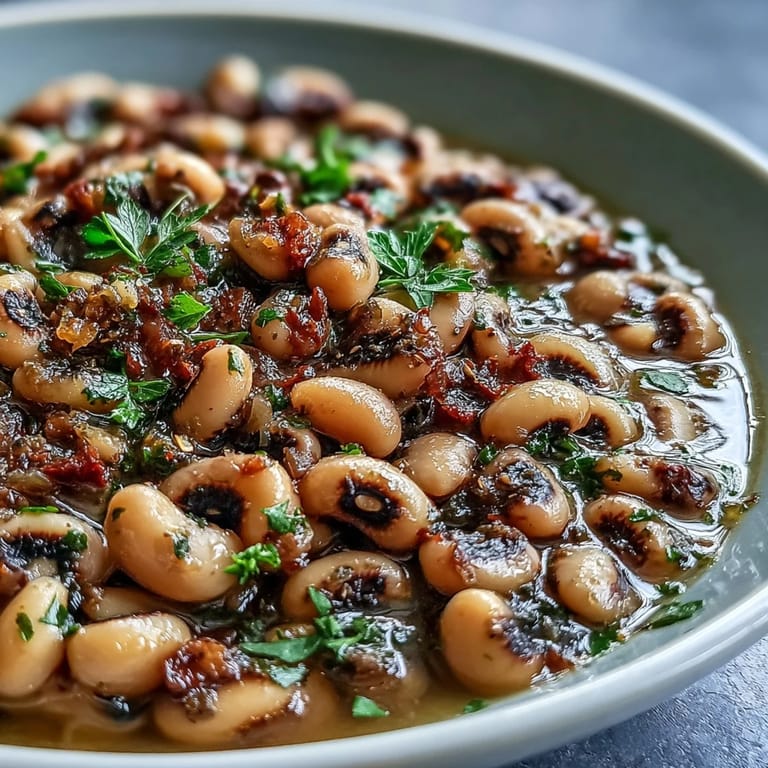
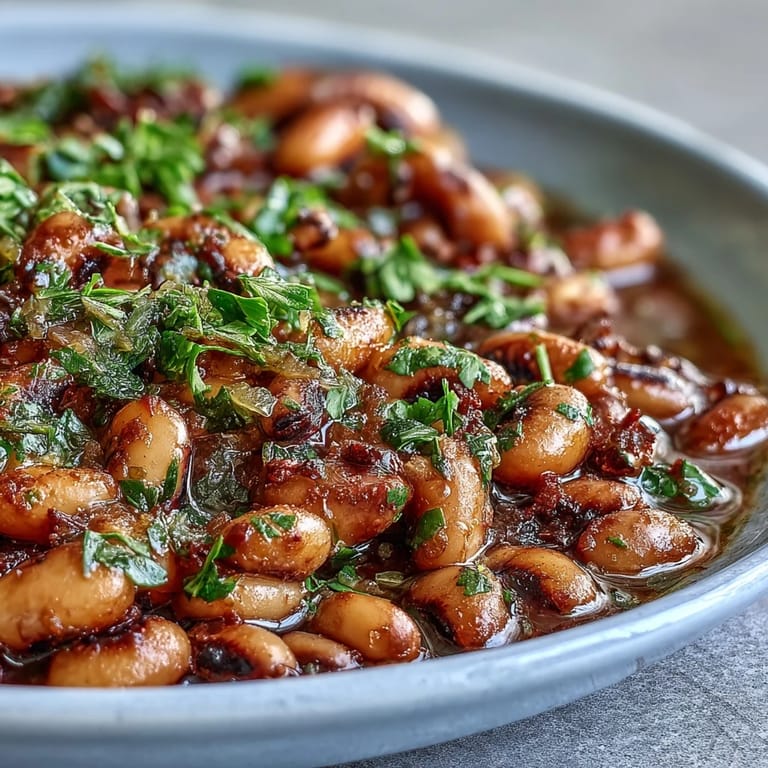
 There's something about the smell of garlic hitting hot oil that makes you realize dinner is actually happening, even on nights when your energy is completely spent. My grandmother kept a bag of frozen black-eyed peas in her freezer year-round, not for tradition's sake, but because she understood that good food doesn't require hours of planning. One Tuesday evening, with nothing thawed and thirty minutes before guests arrived, I pulled out that same bag and threw together what became the easiest, most comforting side dish I've made since. It taught me that sometimes the quickest meals are the ones that taste like you actually cared.
The first time I made this for my partner's coworkers who were stopping by unexpectedly, I was nervous it would taste too simple, too rushed. But watching everyone go back for seconds, talking about how it reminded them of their own families' kitchens, reminded me that comfort food is measured in warmth, not complexity. That night changed how I think about entertaining and last-minute dinners.
Ingredients
- Frozen black-eyed peas: Two cups keeps things quick and honest—no overnight soaking required, and they're just as nutritious as dried peas waiting to be coaxed back to life.
- Olive oil: One tablespoon is enough to build your flavor foundation without making the dish heavy or greasy.
- Small onion, finely chopped: This becomes the quiet backbone of the entire dish, so don't skip mincing it fine or you'll bite into sharp chunks.
- Garlic cloves, minced: Two cloves might seem modest, but they perfume the entire pot in seconds and prove that restraint sometimes tastes better than excess.
- Vegetable or chicken broth: One and a half cups gives the peas something to absorb while cooking, so choose a broth you'd actually drink straight.
- Smoked paprika: Half a teaspoon brings the kind of depth that makes people ask what's in your recipe, even though you barely did anything.
- Dried thyme: A half teaspoon adds an herbal whisper that lifts the entire dish without announcing itself.
- Black pepper and salt: Start with the amounts listed, but remember your broth already carries salt, so taste before adding more.
- Bay leaf: One leaf perfumes everything as it simmers, then gets pulled out before serving—it's flavor work without staying behind to announce itself.
Tired of Takeout? 🥡
Get 10 meals you can make faster than delivery arrives. Seriously.
One email. No spam. Unsubscribe anytime.
Instructions
- Warm your oil and soften the onion:
- Pour olive oil into your saucepan and let it heat until it shimmers—you'll know it's ready when the oil moves easily across the surface. Add your chopped onion and listen for that gentle sizzle; it means flavor is already building.
- Bloom the garlic:
- After three to four minutes, when the onion turns translucent and soft, add your minced garlic and stir constantly for just thirty seconds. This short window prevents it from burning while releasing all its aromatic oils into the oil.
- Build the dish:
- Pour in your peas, broth, spices, and bay leaf all at once, stirring gently so everything gets coated. The mixture will look loose at first, but trust that it knows what it's doing.
- Let it simmer:
- Bring everything to a gentle simmer, then cover and let time do the work for fifteen to eighteen minutes. Stir occasionally and watch as the liquid reduces and the flavors start holding hands with each other.
- Taste and adjust:
- Fish out the bay leaf with a spoon, then take a real taste before deciding if your dish needs more salt, more heat, or just as it is. This moment of tasting is where you actually become the cook, not just the person following instructions.
- Finish and serve:
- Scatter fresh parsley across the top if you have it, letting its brightness cut through the richness. Serve immediately while the warmth is still radiating from the pot.
 Pin It
 There's a particular kind of magic that happens when people sitting around a table realize they're eating something that came together in less time than it took them to get there. My neighbor once asked for this recipe while we were still eating it, and I loved that she wanted to know not because it seemed fancy, but because it tasted like genuine care wrapped up in simplicity.
When You Want More Depth
If you're cooking this for people you want to impress or for yourself on a day when you need more comfort than usual, dice half a bell pepper and sauté it with your onion, letting its sweetness carry through the whole pot. Some cooks add a diced ham steak or a handful of crumbled bacon—the smoke and salt playing beautifully against the earthiness of the peas. These additions don't complicate the recipe; they just expand its confidence a little.
What to Serve Alongside
This dish is happiest when it's not alone on a plate, and cornbread is its most natural partner—the sweetness balancing the savory, the crumb texture contrasting with the soft peas. Some people prefer it spooned over rice, which gives you more sauce to soak into something warm and starchy. Either way, these peas want a companion, and feeding people is easier when you've planned for that.
Storing and Reheating
This keeps beautifully in the refrigerator for three or four days, and reheats better than most side dishes because the peas continue absorbing flavor even as they sit. The next day, you might find it tastes richer, deeper—not because you did anything, but because time does its own cooking work. Reheat gently on the stovetop with a splash of water if needed, or cover it loosely in the microwave if you're in a hurry.
- Make a double batch knowing the second half will taste even better tomorrow than today.
- If you freeze leftovers, give them a day in the refrigerator to thaw before reheating, so the texture stays tender instead of grainy.
- Remember that this dish is forgiving about timing and temperature, so it's almost impossible to mess up once everything is simmering.
 Pin It
 This recipe reminds me that the most nourishing meals are sometimes the ones that ask the least from you. Make it when you're tired, when you're rushed, or when you just want something that tastes like home without having to spend an evening in the kitchen.
Recipe FAQ
- → Do frozen black-eyed peas need soaking?
No, frozen black-eyed peas are pre-blanched and cook directly from frozen. They tenderize in 15-18 minutes of simmering, making them much faster than dried peas which require overnight soaking and long cooking times.
- → Can I use canned black-eyed peas instead?
Absolutely. Substitute two 15-ounce cans, drained and rinsed, for the frozen peas. Reduce the simmering time to 8-10 minutes just to blend flavors, as canned peas are already fully cooked.
- → What makes these taste Southern?
The combination of smoked paprika, dried thyme, and bay leaf creates that distinctive Southern profile. Sautéing onions and garlic in olive oil before adding the peas builds a flavorful base, while the slow simmer allows all the seasonings to meld together.
- → How do I make this dish heartier?
Add diced cooked ham, bacon, or smoked sausage when you stir in the peas. You can also incorporate diced bell peppers with the onions, or serve the peas over steamed rice for a complete one-bowl meal.
- → Can I freeze the leftovers?
Yes, these black-eyed peas freeze well for up to 3 months. Cool completely, transfer to an airtight container, and freeze. Thaw overnight in the refrigerator and reheat gently on the stovetop, adding a splash of broth if needed.
- → What's the best way to season these?
Taste near the end of cooking and adjust salt and pepper to your preference. The smoked paprika provides subtle heat, but add cayenne if you like it spicier. Fresh parsley garnish adds bright contrast to the rich, smoky flavors.