 Pin It
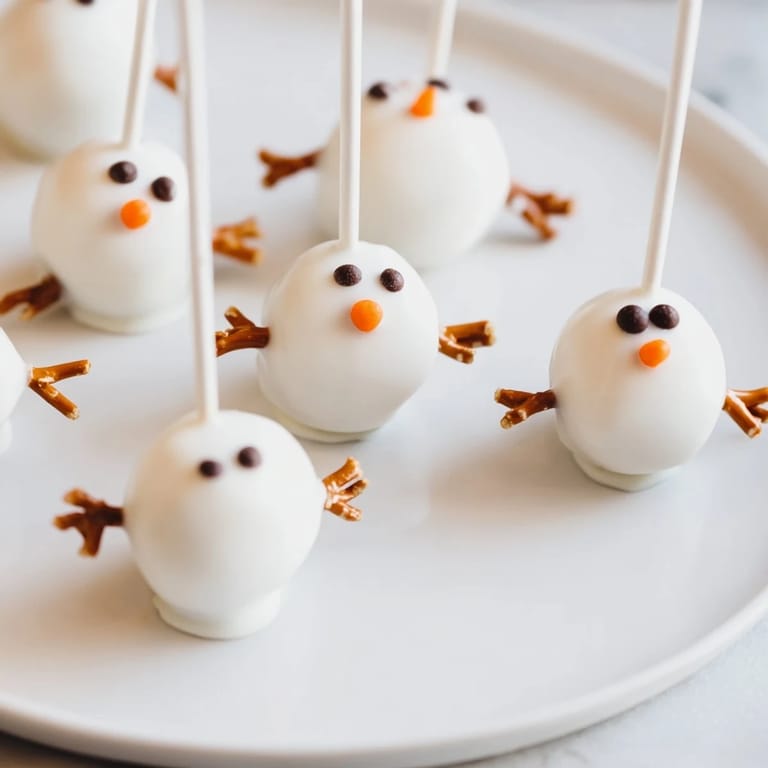
 My daughter pressed her nose against the kitchen window one December morning, watching the snow pile up, and asked if we could make snowmen we could actually eat. That sparked the idea for these Oreo Snowman Cake Pops—they became our tradition, showing up at every winter gathering since. The first batch wasn't perfect; I overchilled them and they cracked when I dipped them, but somehow that made them more charming. Now whenever someone bites into one, there's that moment of pure joy, like discovering something playful inside a dessert.
I remember bringing these to a holiday potluck where everyone was stressed about trying to impress, and watching the whole mood shift when these little snowmen came out. A quiet colleague who barely talked all evening suddenly got animated, saying they reminded him of his grandmother's kitchen. That's when I realized these weren't just about the taste—they were about permission to be playful and silly during a season that often feels heavy with expectations.
Ingredients
- Oreo cookies (36 cookies, about 1 standard package): The foundation of everything—crush them fine enough that the texture becomes almost sandy, which helps the dough hold together smoothly.
- Cream cheese, softened (180 g or 6 oz): This binds everything and adds a subtle tang that keeps the cookies from tasting one-dimensional.
- White chocolate or candy melts (350 g or 12 oz): Candy melts work better than real chocolate here because they set faster and don't crack; if you use real chocolate, add a tiny bit of coconut oil to keep it workable.
- Mini chocolate chips or black decorating gel: These become the eyes and buttons—use whatever gives you the steadiest hand for placement.
- Orange sprinkles or orange-colored icing: For the carrot nose; a tiny dab of orange fondant works beautifully too if you want something more polished.
- Pretzel sticks or colored fondant: Pretzels give an authentic rustic look, while fondant lets you make proper scarves if you're feeling ambitious.
- Lollipop sticks: These keep everything together and make them fun to hold.
Tired of Takeout? 🥡
Get 10 meals you can make faster than delivery arrives. Seriously.
One email. No spam. Unsubscribe anytime.
Instructions
- Crush the Oreos into fine crumbs:
- Pulse them in a food processor until they look like wet sand—this usually takes about 20 pulses. If you don't have a processor, seal them in a zip-top bag and go after them with a rolling pin until there are no chunks left, which is oddly satisfying.
- Mix in the cream cheese:
- Fold the soft cream cheese into the Oreo crumbs by hand, watching for when it transforms from shaggy to silky. This usually takes about a minute of stirring, and you'll feel it click into place.
- Shape the snowmen:
- Roll 32 small balls (about the size of a large grape) and 16 larger balls (walnut-sized), then stack each small ball on top of a large one, pressing gently to bond them together. Insert a lollipop stick through the center of each pair, positioning it so it goes through both bodies for stability.
- Chill until firm:
- Spread them on a parchment-lined baking sheet and freeze for 20 to 30 minutes—you want them solid enough that they won't fall apart when you dip them, but not so frozen they shatter.
- Melt the white chocolate:
- Heat it in short 20-second bursts in the microwave, stirring between each one, until it's completely smooth and pourable. This prevents lumps and hot spots that can happen with longer heating.
- Dip and coat:
- Hold each pop by its stick and dip it into the white chocolate, rotating to coat all sides evenly, then let the excess drip off for a few seconds before standing it upright in a styrofoam block or propping it in a tall cup. The chocolate should set to a smooth finish within a few minutes.
- Decorate while wet:
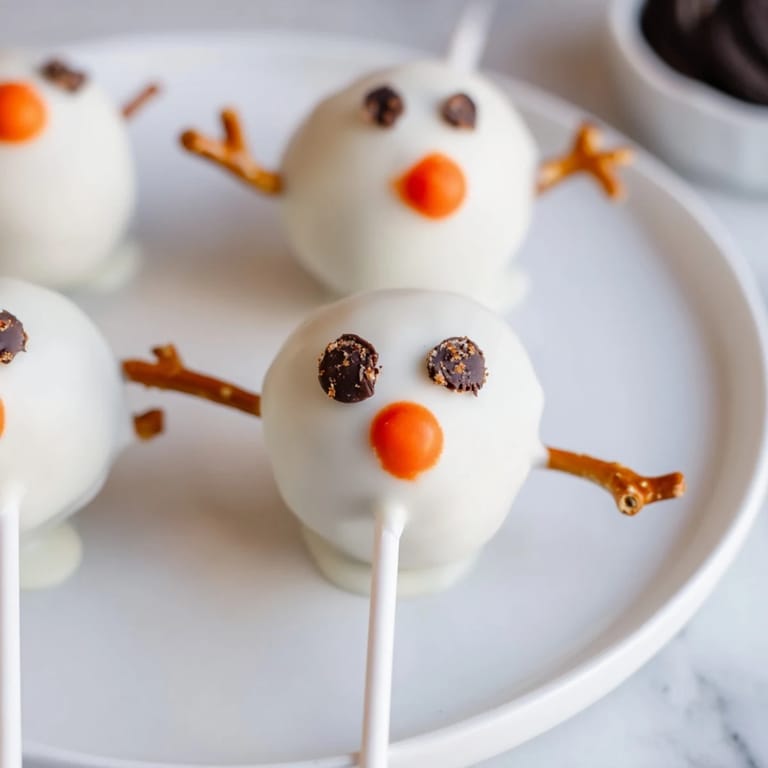
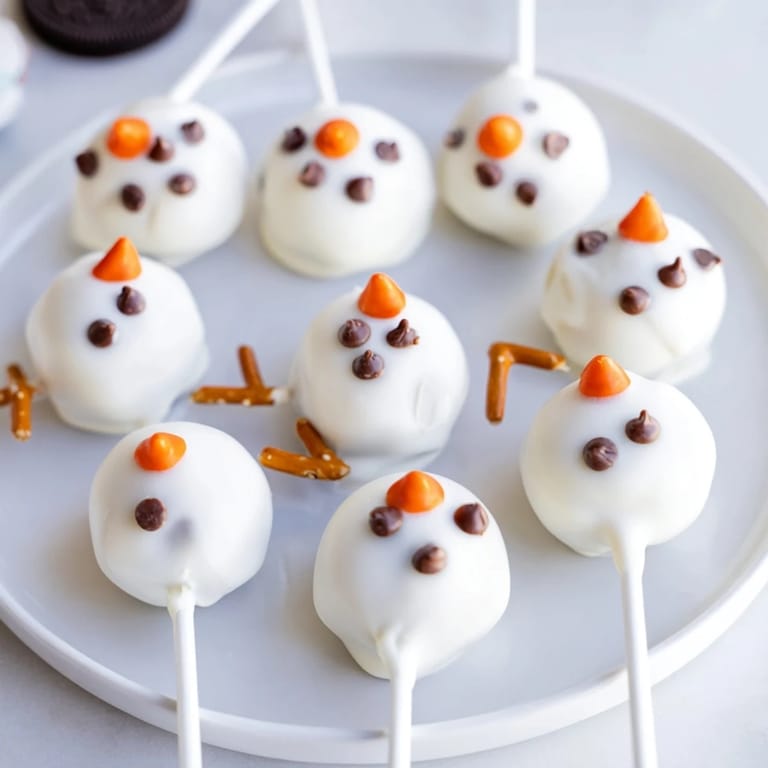
- Working quickly while the chocolate coating is still slightly tacky, place two mini chocolate chips or dots of gel for eyes, a few more down the middle for buttons, and a tiny spot of orange icing for the nose. If the chocolate sets before you're done, you can always use a dab of frosting as edible glue to attach decorations after.
- Add the finishing touches:
- Once the white chocolate is fully set, press a pretzel stick into each side of the top snowball for arms, and wrap a thin piece of colored fondant around the neck like a scarf if you want that extra charm.
 Pin It
 There was a moment during my son's school holiday party when a shy kindergartener took one of these pops and actually smiled—really smiled—for the first time that afternoon. He kept the little snowman's hat on his napkin and asked to take the stick home. That's when I understood that food does something beyond nourishment; it can be a tiny moment of wonder in someone's day.
The Magic of Mini Treats
Cake pops are special because they live in that sweet spot between a cookie and a confection—one bite, perfectly portioned, designed to be shared. There's something generous about making enough for a crowd; it signals that this gathering matters. The Oreo center means nobody's surprised by the flavor either, which somehow makes the visual presentation even more delightful.
Customizing Your Snowmen
Once you master the basic snowman, you can let your imagination run wild—different colored fondant scarves, candy eyes instead of chocolate chips, edible glitter for sparkle, or even tiny fondant hats. I've made them with red scarves for Christmas, pastel scarves for winter baby showers, and even rainbow scarves for a New Year's party. The chocolate coating is forgiving enough that you can practice your decorating skills without real consequences.
Storage and Serving Tips
These keep beautifully in the refrigerator for up to five days in an airtight container, which means you can make them a few days ahead without stress. Bring them to room temperature for about 10 minutes before serving so the chocolate coating softens slightly and the flavor comes through more richly. A wooden cake pop stand or even a stack of books makes an attractive presentation that keeps them upright and visible.
- If you're making these ahead, layer parchment paper between each pop so they don't stick together.
- For a party, arrange them on a platter with fake snow or white tissue paper underneath for that extra festive touch.
- Keep a small plate of extra decorations nearby so guests can add their own embellishments if they want.
 Pin It
 These Oreo Snowman Cake Pops are proof that the simplest ingredients can become something magical with a little patience and creativity. They remind me that the best recipes are the ones that bring people together and make everyone feel like kids again.
Recipe FAQ
- → How do I crush the Oreos without a food processor?
Place the Oreos in a sturdy zip-top bag and crush them evenly using a rolling pin or a heavy object until fine crumbs form.
- → What can I use to attach the pretzel arms and fondant scarves?
The white chocolate coating acts as an adhesive when still tacky. Gently press pretzels and fondant pieces onto the coating to secure.
- → Can I prepare these snowman pops ahead of time?
Yes, assemble and chill the pops, then coat and decorate shortly before serving. Store them in an airtight container refrigerated up to 5 days.
- → How do I melt the white chocolate evenly?
Use a microwave-safe bowl to melt white chocolate in short bursts, stirring frequently to ensure smooth, even consistency without burning.
- → What alternatives can replace cream cheese for the dough?
Cream cheese is essential for the smooth texture, but for variations, consider mascarpone or a similar soft cheese to maintain consistency.